This is what we are making to celebrate my day!
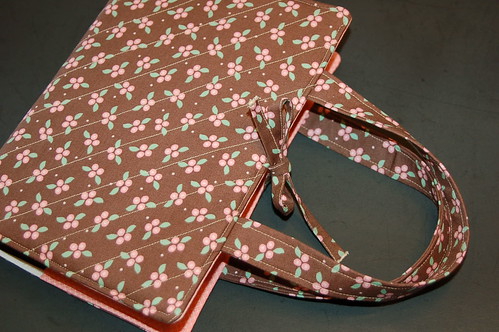
Simple and easily personalized for anyone on your gift list, but don't forget to make one for yourself too! To start gather your materials -
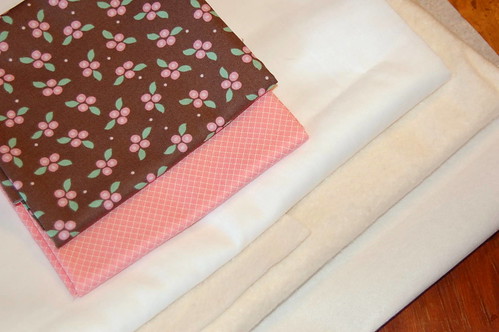
I used two fat quarters and a bit of white for the lining, (you could use a third fat quarter) batting and interfacing. For notions you will need your pins, cutting mat, ruler, rotary cutter, iron/ironing board, and a fresh needle in the sewing machine.
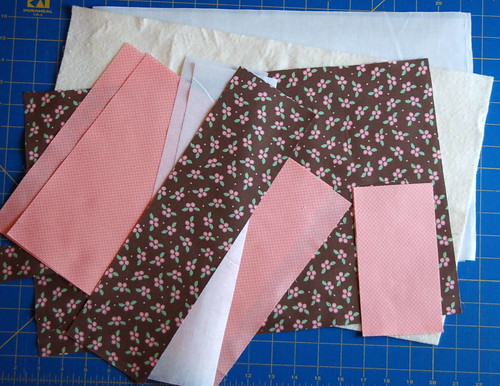
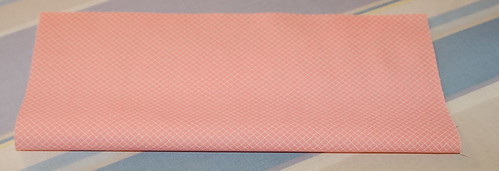
Get everything cut in the beginning then it goes together pretty quickly.
From your exterior fabric cut - 12 x 18" 2 - 4 x 14" 1 - 1.5 x 18"
Interior fabric cut - 2 - 11.25 x 10" 2 - 6.5 x 3.5"
Lining fabric cut - 11.25 x 17"
Batting cut - 12 x 18"
Interfacing cut - 11 x 16.5" 2 - 4 x 14"
Math Interlude:
My Bible measures 14 3/4" (full width of cover) by 9 5/8". This is a common size, but not the only size Bible - please take a few minutes to measure your closed Bible before getting started. If your Bible is a different size pull out the calculator :)
For example --
12.5 x 8"
multiply 12.5 by 1.2 = 15
multiply 8 by 1.2 = 9.6 I would probably go with 9.5
I came up with the 1.2 after crunching numbers to add seam allowance and room for bulk, I wanted to know that my crunching was similar for the width and height. If you are altering the measurements please note that I cut the exterior piece larger than needed and trimmed it down after quilting.
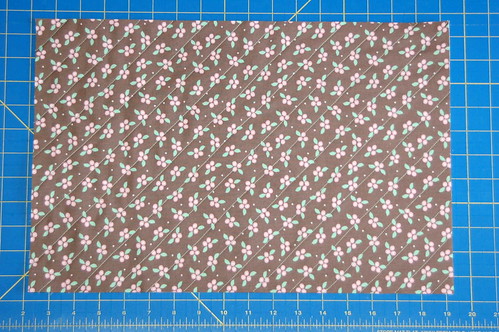
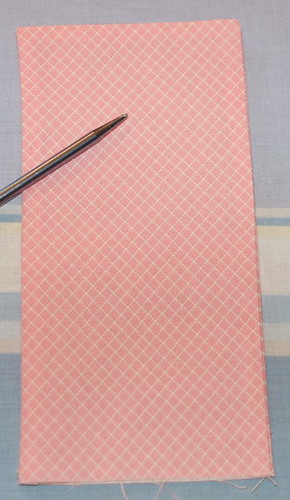
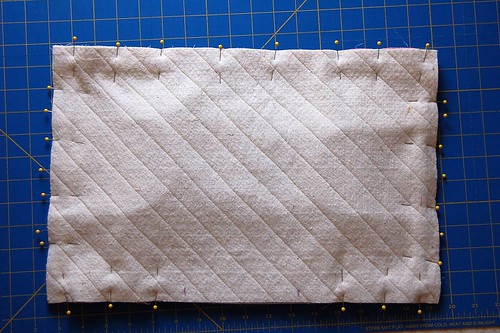
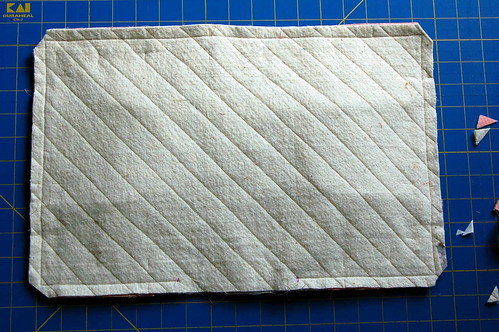
Back to the fun stuff! Time to quilt your exterior piece, however you desire! This one has been diagonally quilted in one inch intervals
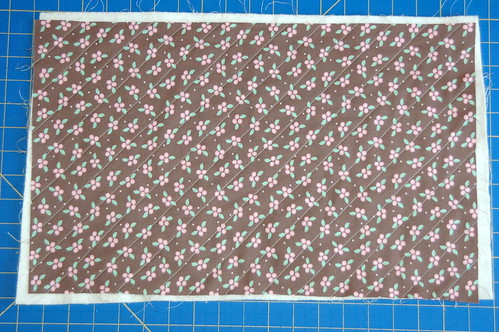
I used my ruler with a 45 degree line to mark my piece.

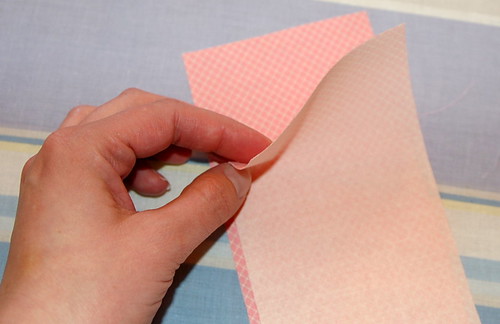
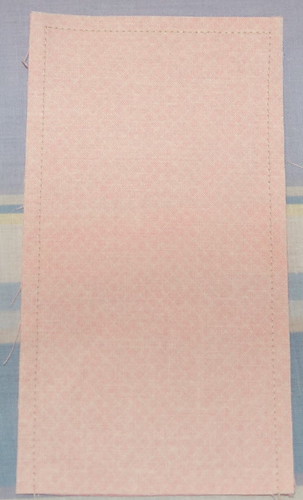
After quilting trim the exterior piece to 11.25 x 17"
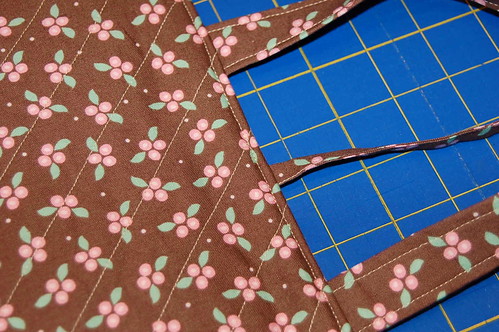
Handles and ties--
Add interfacing to your handles, 4 x 14" pieces, then fold it in half and iron a crease.

Open the fold and iron both sides into the center,

keep your center crease sharp while pressing the sides in.
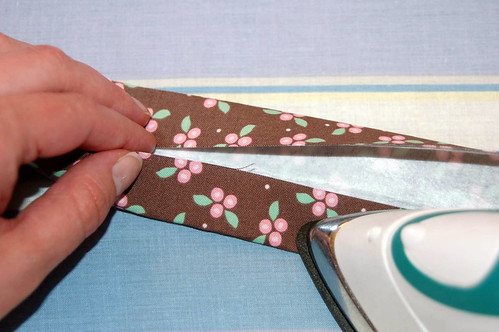
Use the same method to make the tie.

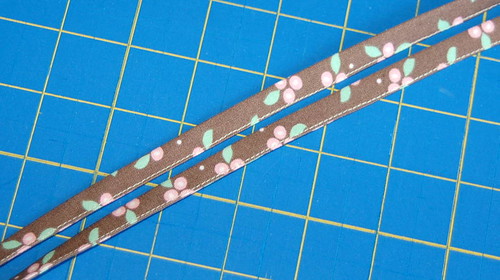
Back to the machine to topstitch -

The completed handles -

And ties -
I treated the ties as one until now, cut them in half for two, and on one end of each finish the raw edge. I zig-zagged over the edge, like so.

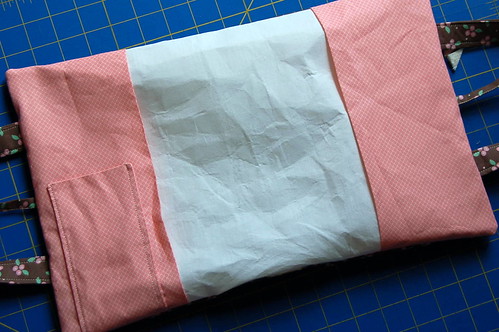
The pen pocket --
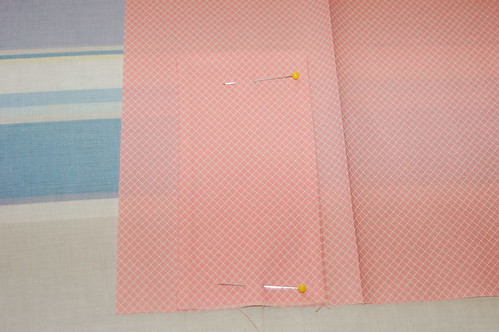
Sew around three of the four sides, leaving the bottom open to turn it right side out, stitch 1/4" seam.
Clip your corners

Turn it right side out, and press.
I like to use a knitting needle to help press the seams out.
To add it to the cover, prep your interior pockets.
Be sure to keep your height at 11.25" and press a nice crease.
Pin your pocket an inch away from the fold
Topstitch it in place.

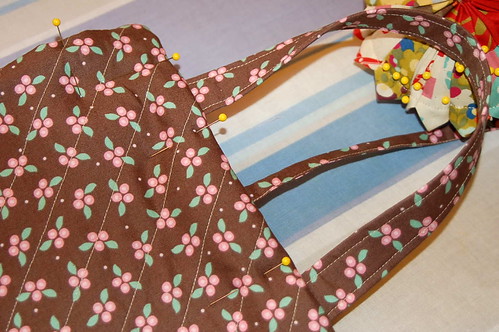
Pulling it all together --
Add the interfacing to your lining piece. Time to start building! Set your lining, right side up on a flat surface,
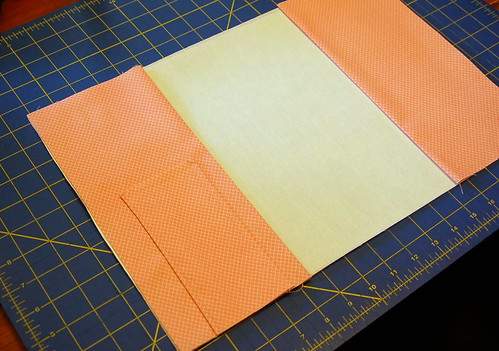
Add the interior pockets.
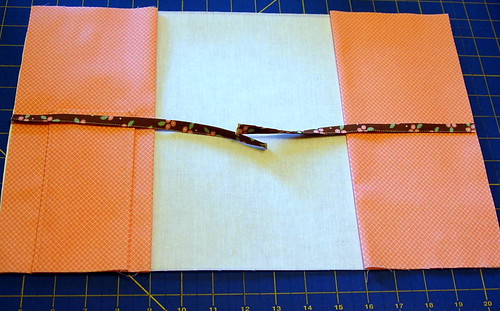
Add the ties at the center, and pin.
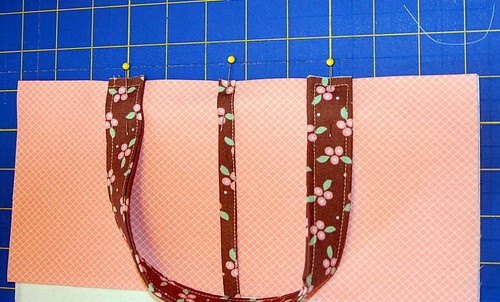
Add the handles, 5" apart is a good number for this size cover. Pin the handles in place, carefully keeping them straight.

Now lay your quilted exterior piece, right side down, and pin in place.
Mark an opening, about 6" in between the pockets. Sew with 1/2" seam, reinforcing at beginning and end. Go slowly over the handles.

Clip your corners, and any extra bulk if possible.
Begin to turn it right side out - you need to take your time as it unfolds.

Use a handle to get it started.
Once right side out, begin to press the seams into place. (I actually tried it on here real quick first!) Also use a few pins from the outside to keep the layers in place while topstitching.
Topstitch all the way around the cover, this will close the opening you left to turn it right side out earlier.
I think that's everything! There are lots of little steps, but not too complicated, I hope it all makes sense to you! If not - PLEASE let me know! I want to fix it :)
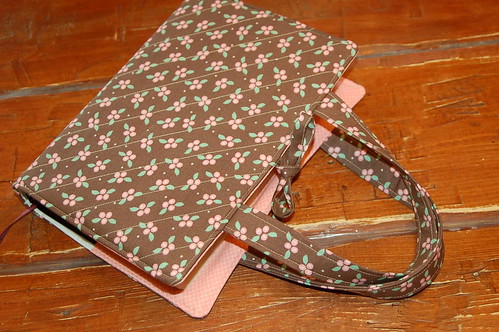
Add your Bible and enjoy your new cover!
Amy
PS - I have a pdf of this tutorial available here!
-----
60 comments:
Looks great! Thanks for the great tutorial.
Happy, happy birthday!! I hope your day is special!
Thanks for sharing the tutorial. This will make a great present.
A very happy birthday to you! I hope it's fabulous!!
Happy Birthday Amy! Great tutorial. Thanks :-)
Jocelyn
http://happycottagequilter.blogspot.com/
Happy birthday to you! 32 is such a great age!
Love your project today! I especially love the diagonal quilting, and those handles are fab! I can see using this for so many things. Happy Day!!
Happy Birthday to you Amy!!
~Tootles for now!
Have a happy birthday!! Cute tutorial too. Jennifer
Happy Birthday! Hope you have a great day! Thanks for the fabulous tutorial.
Happy Birthday! Hope you get everything you want!
Happy, Happy Birthday Amy! Did you buy yourself some fabric???
Happy Birthday!!! I am almost 32 as well, in June! :) I hope you have a wonderful day! I love your Bible cover, fabulous job!!!!
I bet you bought fabric! :)
Happy Birthday, Amy. Thanks for the great tutorial.
What a great cover, and have a fabulous birthday!
Happy birthday. Hope you get to party all week-end. Liked the tutorial.
Happy happy birthday!! I hope you have a super day...let me guess, you bought a new vacuum? LOL!!!
This I think I could do. It looks great!!
Happy Birthday Amy! Thank you for the tutorial. I hope you are having a wonderful day.
Happy Birthday. I hope it is wonderful. Thank you so much for sharing this tutorial. I have been looking for an easy one.
Molto interessante. Grazie!
Great tutorial - I need to make myself one.
And Happy BIrthday - did you buy yourself some fabric? Hope you have a wonderful day!!
Happy Birthday!!!
Thanks for the tutorial. I think I will make a couple of these. :D
Congratulations!
What a lovely tutorial.
Happy Birthday to you. To be 32 again Only in my dreams. Great book cover. Thanks for the great info.
Happy Birthday! Enjoy your day!
Happy Birthday Amy, may the year ahead be happy and healty and lots of material for you to quilt. I had trouble downloading and printing your tutorial
Happy Birthday! Hope you have a fun day!
Happy Birthday! Wishing you another fabulous year!
Hi Amy. Almost missed a birthday greeting-hope your day is/was well.
Now...if I could only quilt (trying to read some beginner's books now). The word Bible always grabs my attention. I'll remember this tutorial and certainly use it when I'm ready. BTW: You give excellent, detailed instructions. Take care and as always, great blog and excellent work.
Happy Birthday Amy!
Great tutorial - nice and detailed.
HAPPY BIRTHDAY!!!!!!!! I hope you got yourself something nice - can't wait to hear! Thanks for the great tutorial!
Happy Birthday, Amy! Thank you so much for sharing the Bible cover tutorial...and especially the pdf! My mom needs a new one and I have just the fabric for it.
Have a blessed year :-)
Yes, Happy Birthday! Did you buy some fabric?!
This is a great tutorial. Thanks for always sharing!
Oh and I've been meaning to tell you - I saw the Wonderland collection in person... oh my! I want ALL of it!
My goodness that's pretty fabric! Great tutorial. Thank you. And I sure hope you had a great birthday!
my grandma would love this. i'll have to remember this come christmas.
happy birthday! now you are as old as me!
Amy-you really did a good job explaining the whole process!
Belated Happy Birthday Amy. Great Tutorial, so many other applications for this too!
Happy, Happy Birthday Amy!
happy (belated) birthday, Amy! awesome job on the tute. Hope you had a fun day!!
Amy,
Happy Birthday! I hope it is wonderful, and isn't just celebrated over a day. There is a theory that someone that turns 100 should celebrate for a year, thus someone that turns 50 should have six months....so you should certainly get more than a day to celebrate your birthday "window".
Enjoy!
SewCalGal
www.sewcalgal.blogspot.com
Your tutorial is GReaT!!! Really well written and so proffessional looking too!
Great design too with the addition of the handles, LoVe that!
Happy (belated) Birthday, Amy! I hope you had a great day. And, another wonderful project! I love the fabric you chose, and the tutorial is great. What a Sweetie to share with all of us -- thank you!!
Happy Birthday to you, Happy Birthday to you!!! It was my birthday last week too! I just sent you an email about it and popped over and found out it was yours too! I love being a May baby! and did you realize if you rearrange your name it's May??
Happy belated birthday Amy. What a great little gift to give a girl when she receives her first adult bible (fourth grade at our church). Thanks for the tutorial!
Happy Belated Birthday.
Thanks for sharing the pattern, I need to make a cover as my bible is looking a bit dog eared.
very cute! Thanks for taking the time to post a tutorial!
happy belated birthday!!! hope your day was wonderful!
Great idea and great tutorial. Thanks!
It looks so great!It's the best I have seen so far on the internet!
What a lovely way to celebrate a wonderful birthday!
i loved this tutorial! it was so easy to follow. this was a great project and it was fun to make. thanks for sharing =)
Great tute, Amy, thanks!
I make paperback book covers that are similar but I add a ribbon at the top for a bookmark.
Hey, we share a birthday, except I have a few years on ya! (OK, I have 20, if I'm being honest, but age is only a number, right?) lol Happy Belated Birthday! I spent mine in the car all day driving to FL for our annual beach vaca. It was fun!
Susan/FlossieBlossoms
I just did a search for making a bible cover and I came across this. WONDERFUL!! Easy to follow instructions. Can't wait to get started!
This is an awesome tutorial, thanks for it! I just have some questions about adjusting for different sizes... like, what's the math behind all of the other numbers? :)
Thanks!!
Anna
Anna - Do you mean for the pockets and such? If you email me with your addy and measurements I can help you figure it out!
Amy
amy1399@gmail.com
Hi Amy! Thanks for a great tutorial. I made one of these for myself for my own birthday. It seemed only fitting :-) You don't have a Flickr group for your tutorials and patterns, do you? I'd love to see what other people are making too!
Wohoo! Great tutorial. I just finished two covers (see them here: http://emsewandsew.blogspot.com/2010/03/scripture-cases.html) and plan to make at least one more. Your math conversion chart for different sizes of books works like a charm! Thanks for sharing :D!
Thank you so much for this! I want to make some of these to give away at church. Many people make rosaries and donate them, but I thought this would be very nice, too!
God Bless!
Thank you Amy for this post and for all your effort in making such a good tutorial for anyone out here to follow. I am certainly going to make one and if I make a good job of it I shall make one each for my daughter-in-laws. Thank you for the inspiration.
Blessings! Val
Hello Amy
I found your post ala google and just wanted to say "thanks!" Here is a link to my finished project, in case you'd like to see it :)
Blessings,
Keri Mae
http://www.kerimae.com/2010/04/quilted-bible-book-cover.html
What a great tutorial! I need a bible cover. I am just hopping around through your older posts...so glad that I found you! I will be following you.
I use to belong to a quilting guild in Tennessee (with the encouragement of a dear friend). But the military moved both our families to other locations and with school and work and not being as organized as I would like to be...I haven't quilted in a while, except on long road trips! I love your blog with your tutorials...so I will be back :o)
Blessings & Aloha!
I'm going to have to try this too ! I plan on starting my FIRST quilt top next week ;have to finish up some charity blankets this week ; Thanks again to you & Natalia for your inspiration to get going on it !!!!!!
Post a Comment