Hi there! We are home now and inflicted with the usual bug bites and camping exhaustion :) I went to bed at 10 last night, which I rarely do, but really needed some solid sleep. This week I'm starting with 2 basic blocks to get us started, and I'm going to share some of the most basic steps to encourage those of you without experience thus far.
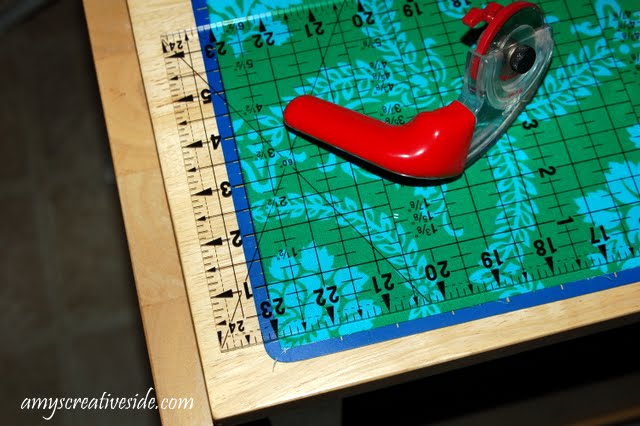
To begin, have your iron & ironing board, starch if you like (I really, really like!) cutting board, ruler and cutting mat out and ready to use.
I like starch because it gives the fabric a crisp finish and helps with stubborn bolt creases.
Just be sure to treat all your fabric the same, if you starch some, starch all. It also tightens the grain, causing it to shrink just a tad.
After ironing out your fabric, you are ready to cut! Here's our first block:
A classic 4-patch. You can make this block in any size and it's still a 4-patch, a great addition to lots of quilts, and a great place to start!
Since we are using 1/2 yard cuts, I decided to take the selvage off and use one end, usually we use the width and cut strips, but I don't need a lot of these and want to conserve my fabric. Cut one strip 6 1/2", then square the end, and crosscut 2 - 6 1/2" squares.
Repeat with your alternate fabric, and lay out blocks as shown.
Pin the top two squares together, like so:
I find pinning at either edge, keeps the layers from stretching while I sew. And one in the middle to keep things lined up nice :)
I chain stitch as much as possible - it save thread and time.
Next iron your seams, first set the seam by pressing it just as you have sewn it.
Then open your seam, and carefully press open.
Flip it over and press from the right side as well, make sure you didn't get any extra creases in there.
Layout your pieces in the block formation
Match up your center seams, like so:
Usually I do this in my hands, without a camera....Open where your seams match up to verify that they are lining up as you wish.
Pin on either side of the seam, in the seam allowance.
Match the edges and pin in the center as well.
When sewing, wait until you have your needle in the seam allowance to remove your first pin, then slowly go over the seam and remove the second pin.
I always double check my seams before I iron, stitches are easier to remove when they have yet to be ironed. Learn from my experience! They matched so I ironed, if yours do not match as you would like, take out an inch on either side, and try again.
Second block, a simple mosaic, or 16 patch. More practice in basic skills :)
Press your fabric, fold with selvage edges together, and
square your edge, notice that my ruler is lined up on the folded edge of fabric.
Cut one 3 1/2" strip.
Remove the selvage edge and crosscut 8 - 3 1/2" squares.
Repeat with alternate fabric.
Eight of each
Layout your squares in the block formation, and pin pairs together. I like to turn one over onto the other, then pin, so I don't mix things up.
Pin like so:
Ready to sew!
More chain stitching, saving thread and time.
Press your seams open as instructed earlier.
Forming rows, lay the left over the right and pin.
Sew and press seams, layout rows.
Turn one row down onto the next and match seams up.
Pin carefully.
Check points and press seams open.
Join the two halves together, pin carefully and sew.
All done!
There's lots of little steps in there, they go quick once you get into a rhythm. You can piece one block at a time or do all the cutting and pinning at once - do what makes you comfortable :) Do you have questions? I'll do my best to answer then in the comments. I hope that things are clear and easy to understand.
**
After you make your blocks, post about them on your blog, then post a link here:
I just realized this would be a great way to cheer each other on :) And encourage you to get them done right away. I'll still post a list this week of blogger's quilting along, as not everyone blogs.
Happy Quilting!
Amy
PS -
Here's a image of the entire quilt!
---------------------------------------------------
Next steps:
Subscribe to
Amy's Creative Side
Shop with Amy
Follow Me on Twitter
Become a fan of
Amy's Creative Side on Facebook
Email me


52 comments:
The instructions look great! I love seeing all the details, and you have spelled it out nicely in words and pictures. I can't wait to get started. I just found some fabric at home to use. I had intended to use it in another layout, but I think I will love it in this quilt.
Cute, cute, cute!
Such detailed instructions - i LOVE it!!! If I didn't know how to do this before, I would DEFINITELY know now.....
I so wish I had time to join in, but I will enjoy watching you and everyone else for SURE
The instructions look very detailed and I love your fabric! Can't wait to get started on these blocks this evening!
Thanks for the great tutorial and photo instructions! You make it look so easy that anyone can do it! What kinda rotary cutter do you us? I'm looking to upgrade :)
Hi Amy,
I just stumbled over your blog. Wonderful how you describe your way to Utah and how you became a passionate Quilter. I discovered how much fun it is to sew about a year ago myself. Knew some basics, but now I found my passion in sewing bags of all sorts.
I use Martelli's Ergo cutter - I tried one out at a local show and loved how smooth it cut!
http://www.amazon.com/Ergo-2000-Rotary-Cutter-Right/dp/B00188DNU2/ref=sr_1_1?ie=UTF8&s=home-garden&qid=1277235169&sr=1-1
I highly recommend it!
As someone who has been wanting to start a quilt for the longest time, but has been so intimidated, this looks doable. Thank you Amy so much for making it easy for people like me!
Amy, did mom order one of the cutters? I know she was asking you about the web site. Cuz i was thinking I could check her out if that were the case, see if I like the angle of it.
I am buying material at the shop hop tomorrow! Then I'll start.! The steps look great.
The instructions were so easy to follow! Thanks for this quilt along! I linked myself as a joiner.
Amy,
Some great instructions! For this entire quilt, we are only going to need just ONE four patch block and ONE Moasic block? Just checking! I like to make all of the same kind of block....just asking!!! lol...
hugz, Pam
Yep! One of each! I added a link to the post with a image of the entire quilt above :)
Thanks Pam!
That is a great tip for getting that crease out! These blocks are really fun, especially with Sis Boom fabrics. I really adore that mosaic block!
I am joining in! Cutting into my beloved Wild Thyme and Seedpods! I did my cutting before dinner and hope to sew tonite while listening to the White Sox game. I would like to suggest that maybe you could set up a flicker group so that those of us without blogs can post pics. I would love to see everyone's blocks! Great tutorial by the way, so thorough. Cheers! Andie.
Quick question.... I have a cutting board and rotary, but have no idea what size ruler to buy (as a first time quilter). What would you recommend? Do you use a variety of sizes? What would be the most practical to start with. I have asked the ladies at our local fabric shop, but they are clueless....
Amy, I'm so excited to do this, and your instructions are wonderful. I'm waiting for my fabrics to come in the mail, so I hope to complete them this weekend with a friend who is also joining. I linked the patch on my blog and will link the updates above as we work :)
Amy
I am ready to go. I was sort of depressed I could not participate in the quilt class I took last year. But you gave me the perfect solution. If you look at my blog for give me, It's new and I am working on the post's.
This tutorial looks great!!
I do want to participate, but not sure I will be able to keep up. I will be plugging along though!
thanks so much!
SheilaC
The linky is a great idea! Your blocks are darling!
Liesl, I just sent you an email that you will never get :(
My favorite size ruler is 6 1/2" x 24", I can cut a full width of fabric with just one fold! My second fav, is a little 6" or 6 1/2" square, it's nice for crosscutting smaller squares or rectangles...nice but not necessary if you are only getting one :)
oops--I finished the two squares and my 16-patch block is a little smaller than the 4-patch. I assume my 1/4" seams are not accurate--Am I supposed to do a scant 1/4" seam or do you think my squares are not exact? I'm new to quilting and I thought cuts were true to size and the seams measure 1/4" exactly. Where do you think I messed up?
Just finished the first 2 blocks! The directions are very detailed and easy to follow. Can't wait for the next blocks!
To Anonymous:
I would guess that your seams are just a tad too big. I have a tutorial here - http://www.amyscreativeside.com/2010/03/basics-tutorial-sewing-accurate-14.html
for sewing 1/4" seams accurately :)
Thanks Amy! I am so looking forward to next weeks blocks!
Question.....What type of rotary cutter do you use?
I did block one tonight. I have a question for you. Why does my last name appear on the link to my blog? I guess it is no big deal but I was just wondering. Thanks for this quilt along.
Thanks Amy :) It is SO good to ask questions from someone who knows what they are talking about!!!
Amy, Thanks for the great instructions!! I was so excited to get home today to quilt! I love some of the other blocks that I have seen so far!
Just an add on to my comment, I would love to comment on all of the blocks as people do them, but if you don't have the option of Name/Url in your comments choices I can't post a comment as I don't have a google account or a blogger account. I blog with my Mac and me.com and that will probably never be an option...lol
But all the quilts posted so far are awesome, and I am loving all the color choices and themes!
YAY! It's begun! I think I'll do bits and pieces of it along the way this time as I need to do a quilt for a older son and I'm not certain he'll want a sampler...hee hee...plus I'll need to have it completed by mid-August. I love the step-by-step! And I've never used starch before either...hmmm...
:-)
Blessings,
Tammy ~@~
yah....i'm loving this...just linked mine, can't wait till next week
I reviewed your tutorial on accurate 1/4" seams, and made a new 16 patch--much better. Thanks, Amy, I'm learning a lot--I think the first thing I'm learning is that I need a new sewing machine!
Finished these this morning and posted pics on my blog!
I am doing these in calicos but am thinking of doing another in batiks!
thanks SO much!
I've been waiting for Mister Linky to start working again all morning! Just got my link posted, and now I'm off the check the others. :)
Thanks Amy - I love the first two!
I finished my squares yesterday. That was fun and I can't wait till next week. Thank you Amy for hosting the Quilt-along!
Just added mine! Looking forward to next week :)
missknitta - I can't comment on your post because I don't have a wordpress account, but I like the Home Sweet Home feel the fabrics have.
Hooray! My first two blocks are done!
(Linking tip: if you're linking to your blog in the widget, please make sure you're linking to the actual post as opposed to just your general blog link)
This is my first serious stab at quilting. thank you for this. :)
I have finished my first block, hope to start on the next one this weekend.
Hey Amy! I got my first two blocks done...easy peasy. If I'd not known how to do these, I surely would have after reading your excellent instructions. Looking forward to next week!
Just linked up! Thanks for doing this and teaching some great techniques!!
I just linked up. Your directions were great ...esp your tips on pinning. I think it really made a difference on the 16 patch for me.
I am enjoying your quilt along so far...thanks for sharing your talents with us, Amy!
hugz, Pam
Thanks for the tutorial Amy, I just added my blocks on the link above. I think this is the first time I had a block finish with all of the corners lining up, YAY!
What a great Quilt along! I am still without a sewing machine, since I gave our older daughter my old one...still trying to decide which to buy! I have been working on a little hand piecing on one of my many unfinished ones!
Just wanted to pop over and say hello! You really do have clear explanations :o)
Thank you for sharing!
Blessings & Aloha!
I found you when I came across your last Bloggers Quilt Festival. It was fun to be a part of that :o)
I will be joining late .... Will start tonight after I get home ! How exciting !!! I'll try to get you pics ; don't have a blog !
I am having so much fun and loving the quilt so much. Thank you for this.
OK, I am caught up and having fun :)
Posted my link and off to look at everyone's progress....
Thanks Amy!
SheilaC
I've posted mine. Quiting is much harder then it looks!
Hi Amy just got mine posted ,this is giving me a chance to try various types of block, what fun.
Oops, there has to be one in every crowd...am working on the blocks now...just saw your post on "Stash Manicure", decided to join, and jumped the gun..will post pictures soon..
Post a Comment