June 30, 2010

Dresden Plates

I really thought I needed to get a few more things done today, before sewing up these plates....but the piles were calling to me.  I'll get to the other stuff here in a few minutes :)

What do you think?


I LOVE them, but I can't decide which center plate to use.  I have time though, I next need to figure out what my background will be, and if I want to piece it.

Hope you are having a productive day!
Amy
---------------------------------------------------
Next steps:
Subscribe to Amy's Creative Side
Shop with Amy
Follow Me on Twitter
Become a fan of Amy's Creative Side on Facebook
Email me

June 29, 2010

Started!

In the comments on my last post, I was challenged!
In between, "mom" responsibilities, I cut and sewed more than enough dresden plates!  Not that I'm afraid of new york beauties, I just couldn't get excited for this project about them....these I'm excited about.

So Lindsay...What have you been working on?

I have a few things on the household to do list, hopefully I can resist this pile until later :)
Amy
---------------------------------------------------
Next steps:
Subscribe to Amy's Creative Side
Shop with Amy
Follow Me on Twitter
Become a fan of Amy's Creative Side on Facebook
Email me

Starting

I have a to do list, including a throw quilt, twin quilt and doll quilt...the trouble seems to be starting! (I have all the fabric, I've been focused on the quilt-along so far)  So today I'm going to start on the doll quilt :)  I had been thinking new york beauties, but I'm chickening out - I'm going to make some dresden plated with these Happy fabrics!
Keep me accountable - okay!?  I need to share some progress here really soon, so I can work on the rest of the list.
Blessings,
Amy
---------------------------------------------------
Next steps:
Subscribe to Amy's Creative Side
Shop with Amy
Follow Me on Twitter
Become a fan of Amy's Creative Side on Facebook
Email me

June 28, 2010

Simple Sampler Quilt Along -- Week 2

Happy Monday!  I'm all set and ready to share the next two blocks, are you ready!?  Just in case you are starting now, these will catch you up -

Simple Sampler Quilt Along Details (includes a pic of the quilt)

I have a flickr group here too!  Amy's Creative Side on Flickr

Also, if you have one block smaller than the other, most likely your seam allowance is a teeny bit big.  If you were making the same block for an entire quilt it wouldn't matter too much, you could just trim them all to the same size.  With this sampler, you could trim all to the same size when you find your smallest block after sewing them all. Or, if you would like to have more accurate seams check out my tutorial - Sewing Accurate 1/4" Seams.

Here's our first block for this week: Plus
Here's what you need:
From one fabric cut
1 - 4 1/2" x 12 1/2" rectangle and 2 - 4 1/2" x 4 1/2" squares
From a second fabric cut
4 - 4 1/2" x 4 1/2" squares
If you need help with cutting go back and look at the first set of instructions, or ask in the comments.

Then layout as shown here:
 We are going to work on the sides first.  Lay the top squares down over the center squares.
 Pin and sew your pieces together.
 Press your seams open, and set it back down with the other pieces.
 Lay your bottom pieces onto the center.
 Pin and sew together.  Then press.
 Almost there!  Pin and sew one side to the center.  Since there aren't any seam to match up begin pinning at either edge and work your way in.
 When I'm sewing a piece that has seams in it to one that doesn't, I like to keep the seams up so that I can keep track of them and make sure that they are flat going under the needle.

 Now repeat with the other side to finish the block!


 Not too bad - right?  Next up is the Double Four Patch:
It's a mixture of the two blocks that we made last week.
 Here's what you need:
From one fabric -
2 - 6 1/2" squares and 4 - 3 1/2" squares
From a second fabric -
4 - 3 1/2" squares
Lay them out to make sure you have it in the right spots.
 Starting with the smaller pieces, lay them over each other as shown, and pin.
 Sew them together and press seams open.
 Lay one pair over the other, match seams, pin and sew.

 I've made lots of silly mistakes by sewing my pieces together differently than I had intended, which is why I always lay them out in between each step :)
 Lay one of the four patches over the 6 1/2" square.
 Pin and sew them together.
 Press your seams open.
 Lay one half over the other.  Pin and sew.

 Check and press seams open, one last time.
 Here's my blocks to date --  yay!

**After you make your blocks, post about them on your blog, then post a link here:

It's been fun to go visit and see your blocks, feel free to post to your flick picture if you aren't blogging.

Let me know if you have any questions!  I will answer them in the comments :)
Happy Quilting!
Amy
---------------------------------------------------
Next steps:
Subscribe to Amy's Creative Side
Shop with Amy
Follow Me on Twitter
Become a fan of Amy's Creative Side on Facebook
Email me

June 26, 2010

Weekend Spotlight

This weekend the spotlight looks to Pink Chalk Fabrics!  
Kathy has great a great selection of fabric and is always quick to ship - perfect for the fabric addict in all of us :)  Have you checked out her shop recently?

Amy
---------------------------------------------------
Next steps:
Subscribe to Amy's Creative Side
Shop with Amy
Follow Me on Twitter
Become a fan of Amy's Creative Side on Facebook
Email me

June 25, 2010

Featuring Debbie -- A Blogger's Quilt Festival Quilter!

Hi Friends!  I hope you are doing well, I've had a busy week with the kids and hope that the weekend is relaxing!  We'll see how much sewing I can squeeze in!

Today's featured quilter is Debbie!  Debbie blogs at Esch House Quilts and has an amazing aesthetic to her quilts.  Enjoy --

1. When did you begin quilting? 
I began quilting in 2002 after sewing pretty much my whole life.
2. Why do you quilt? 
Because I can’t stop! Seriously, the colors and the graphic design are such a wonderful creative outlet. It is so satisfying to create something from your own mind with your own hands. And better yet if that something keeps you warm, warms the heart of a friend or the décor of your home.

3. What is your favorite quilting tip? 
I’m not very good at free motion quilting, so when I want to quilt a curvy motif on a quilt, I draw it on freezer paper, iron it to the quilt top and quilt around the freezer paper. 


4. What was your inspiration for your Quilt Festival quilt? 
When I was designing “A New View” there were several ideas going around in my head. I was interested in making an asymmetrical quilt and in the graphic possibilities of very simple blocks. I was fascinated with windows in buildings around town and I wanted to make a scrap quilt that was not multicolored. These ideas all merged together to become “A New View”. 

5. Do you sew other things? 
I do sew other things. These days my non-quilt projects are most likely to be home dec projects such as roman shades, curtains or pillow covers. I used to make a lot of clothes and have made quite a few Halloween costumes! 


6. Anything else you would like us to know about you? 
I am so inspired by all the amazing (mostly) women I see on the Internet finding time to fit creativity into their busy lives.

-----
Thanks for sharing Debbie!  I love your FMQ tip, that is a great tip for anyone wanting to move into more free motion quilting.  


:)  Amy
---------------------------------------------------
Next steps:
Subscribe to Amy's Creative Side
Shop with Amy
Follow Me on Twitter
Become a fan of Amy's Creative Side on Facebook
Email me

June 24, 2010

The Finer Things

A couple months back, I decided to try some new thread and the recommended needles.  I had been having trouble with tension in my machine and the obvious lint build up was part of the problem.  I spent a little bit more than I usually do, but I believe the payoff is huge!  My machine has been happier!

And so, here are a few of the finer things I have enjoyed using while sewing lately :)
So Fine Thread &Topstitching Needles by Superior Threads  -- The needles seem to stay sharp longer than other brands.
Famore Scissors - the tip is tiny, helps to get threads from the tiniest spaces.
Patchwork Pins - so tiny and fine, no visible holes left in the fabric after pinning.
Selvage Pin Cushion - it stays where I put it while pushing pins in as I sew.

The next thing I need to find is a cone holder/stand.  I love the thread so much I went with a cone, and it's much to big for my machine - so far I've just set it on the table, and let it feed up, but I don't think that will last too long.

Do you have a favorite notion, or two?

Blessings,
Amy
---------------------------------------------------
Next steps:
Subscribe to Amy's Creative Side
Shop with Amy
Follow Me on Twitter
Become a fan of Amy's Creative Side on Facebook
Email me

June 22, 2010

Simple Sampler Quilt Along -- Week 1

Hi there!  We are home now and inflicted with the usual bug bites and camping exhaustion :)  I went to bed at 10 last night, which I rarely do, but really needed some solid sleep.  This week I'm starting with 2 basic blocks to get us started, and I'm going to share some of the most basic steps to encourage those of you without experience thus far.

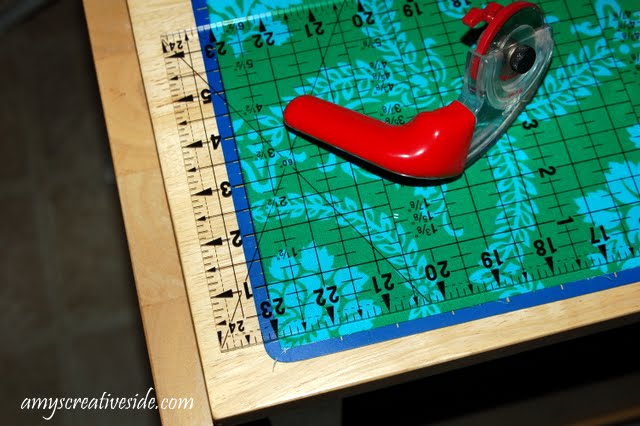
To begin, have your iron & ironing board, starch if you like (I really, really like!) cutting board, ruler and cutting mat out and ready to use.
 I like starch because it gives the fabric a crisp finish and helps with stubborn bolt creases.
 Just be sure to treat all your fabric the same, if you starch some, starch all.  It also tightens the grain, causing it to shrink just a tad.
After ironing out your fabric, you are ready to cut!  Here's our first block:
 A classic 4-patch.  You can make this block in any size and it's still a 4-patch, a great addition to lots of quilts, and a great place to start!
 Since we are using 1/2 yard cuts, I decided to take the selvage off and use one end, usually we use the width and cut strips, but I don't need a lot of these and want to conserve my fabric.  Cut one strip 6 1/2", then square the end, and crosscut 2 - 6 1/2" squares.
 Repeat with your alternate fabric, and lay out blocks as shown.
 Pin the top two squares together, like so:
I find pinning at either edge, keeps the layers from stretching while I sew.  And one in the middle to keep things lined up nice :)
I chain stitch as much as possible - it save thread and time.
Next iron your seams, first set the seam by pressing it just as you have sewn it.
Then open your seam, and carefully press open.

Flip it over and press from the right side as well, make sure you didn't get any extra creases in there.
Layout your pieces in the block formation
Match up your center seams, like so:
Usually I do this in my hands, without a camera....Open where your seams match up to verify that they are lining up as you wish.
Pin on either side of the seam, in the seam allowance.
Match the edges and pin in the center as well.
When sewing, wait until you have your needle in the seam allowance to remove your first pin, then slowly go over the seam and remove the second pin.
I always double check my seams before I iron, stitches are easier to remove when they have yet to be ironed.  Learn from my experience! They matched so I ironed,  if yours do not match as you would like, take out an inch on either side, and try again.
Second block, a simple mosaic, or 16 patch.  More practice in basic skills :)
Press your fabric, fold with selvage edges together, and square your edge, notice that my ruler is lined up on the folded edge of fabric.  
Cut one 3 1/2" strip.
Remove the selvage edge and crosscut 8 - 3 1/2" squares.

Repeat with alternate fabric.
Eight of each
Layout your squares in the block formation, and pin pairs together.  I like to turn one over onto the other, then pin, so I don't mix things up.
Pin like so:
Ready to sew!
More chain stitching, saving thread and time.
Press your seams open as instructed earlier.
Forming rows, lay the left over the right and pin.
Sew and press seams, layout rows.
Turn one row down onto the next and match seams up.
Pin carefully.
Check points and press seams open.
Join the two halves together, pin carefully and sew.
All done!
There's lots of little steps in there, they go quick once you get into a rhythm.  You can piece one block at a time or do all the cutting and pinning at once - do what makes you comfortable :)  Do you have questions?  I'll do my best to answer then in the comments.  I hope that things are clear and easy to understand.

**After you make your blocks, post about them on your blog, then post a link here:

I just realized this would be a great way to cheer each other on :)  And encourage you to get them done right away.  I'll still post a list this week of blogger's quilting along, as not everyone blogs.

Happy Quilting!
Amy

PS - 
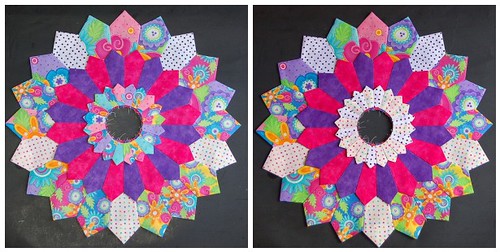
Here's a image of the entire quilt!
---------------------------------------------------
Next steps:
Subscribe to Amy's Creative Side
Shop with Amy
Follow Me on Twitter
Become a fan of Amy's Creative Side on Facebook
Email me