Showing posts with label sewing. Show all posts

July 01, 2010

Couch Pillows - a la Amy

Amy Butler that is!  I have had scraps from my roman shade project waiting for pillows, just no pillow forms.  So I waited.  The kids and I ran an errand for Joe first thing this morning and when finished went to Wal-mart since we were already out - I don't go often.

I found 2 nice 18" pillow form on sale - and snatched them up!  After finally getting home, and convincing the boy to at least rest in his bed... I took an hour to whip these up.

Nothing fancy, but functional and cute!  They have an envelope back so I can wash as needed too.

What have you been up to today?

Can we say leftovers for dinner?

Amy


Linking up with Amy today!
---------------------------------------------------
Next steps:
Subscribe to Amy's Creative Side
Shop with Amy
Follow Me on Twitter
Become a fan of Amy's Creative Side on Facebook
Email me

June 24, 2010

The Finer Things

A couple months back, I decided to try some new thread and the recommended needles.  I had been having trouble with tension in my machine and the obvious lint build up was part of the problem.  I spent a little bit more than I usually do, but I believe the payoff is huge!  My machine has been happier!

And so, here are a few of the finer things I have enjoyed using while sewing lately :)
So Fine Thread &Topstitching Needles by Superior Threads  -- The needles seem to stay sharp longer than other brands.
Famore Scissors - the tip is tiny, helps to get threads from the tiniest spaces.
Patchwork Pins - so tiny and fine, no visible holes left in the fabric after pinning.
Selvage Pin Cushion - it stays where I put it while pushing pins in as I sew.

The next thing I need to find is a cone holder/stand.  I love the thread so much I went with a cone, and it's much to big for my machine - so far I've just set it on the table, and let it feed up, but I don't think that will last too long.

Do you have a favorite notion, or two?

Blessings,
Amy
---------------------------------------------------
Next steps:
Subscribe to Amy's Creative Side
Shop with Amy
Follow Me on Twitter
Become a fan of Amy's Creative Side on Facebook
Email me

May 13, 2010

Madison Bag & a Big Birthday

It's been such a full week!  Thanks so much for your response to my first pattern, and the Blogger's Quilt Festival! In the mean time, I finished my Madison Bag for myself - and almost forgot to show you.

I love the finished product!  Getting there, was a little sketchy, but the size and shape are so right.
The construction methods were a little frustrating.  This is how I had to maneuver the machine to be able to attach the handles....I plan to try another pattern and see how more recent instructions finish the bag.  I wouldn't suggest this pattern for a first time bag maker, but it's so cute.  Don't you think!?


Today is Ella's birthday - she's 10. 10!  My first baby, now 10!  She's been counting down for the last three months, not one second letting us forget that she is SO excited to move into double digits.  Lasagna and cheesecake are on the menu tonight - I bought the cheesecake, but the lasagna will be homemade.  

What are you up to today?
Amy

PS - my manuscript arrived yesterday, time to edit :)
---------------------------------------------------
Next steps:
Subscribe to Amy's Creative Side
Shop with Amy
Follow Me on Twitter
Become a fan of Amy's Creative Side on Facebook
Email me

May 04, 2010

Roman Shade Recap

I had a couple of requests for a roman shade tutorial - I'm flattered, but not planning another window treatment anytime soon!  I thought I would instead retrace my steps, of videos and tutorials that I found in my own quest to understand roman shades.


There are lots more videos and information about roman shades on youtube - I encourage you to keep watching until you find what makes it click for you.

Martha also has a tutorial for roman shades that may be helpful.

As I mentioned before I got my hardware on etsy at I Get the Window.  The cord lock includes instructions - just make sure that you follow them, and thread it correctly.  That's where I had a little trouble...

The wall color is Jamaican Blue by Behr, and we love the bright color!

I hope that this helps some of you wanting to make these window coverings - they make our room cozy and artsy feeling :)

Amy

PS - Kathy at Pink Chalk Fabrics is celebrating her second anniversary with a great sale!  And V, is now looking for finished quilts to be donated to families getting back on their feet.
---------------------------------------------------
Next steps:
Subscribe to Amy's Creative Side
Shop with Amy
Follow Me on Twitter
Become a fan of Amy's Creative Side on Facebook
Email me

April 30, 2010

Roman Shades Complete

Checking this project off my list feels SO good!  
 Our lamp is still trying to find the right home, since rearranging everything.  We did have a table lamp, but, one little boy accidentally trashed the shade....
up
Fabrics are Amy Butler, the home decor fabrics have such a nice feel to them.  Slightly more $$ but worth it for a quality covering in my book!  That is partly why I did the roman shade, 2 yards per window vs. 6 - 8 yds for a full length curtain.

one down
I lined these with black out lining.  Fabrics fade really fast here in windows, and I didn't want to take a chance at my gorgeous fabric fading.  Plus, having the living room dark will be nice for movies, and the hot summer months to come. 
two down :)
 The windows are on the small side, so I decided to mount them over the window and made them a few inches wider and longer, to give them more of a presence.  I really, REALLY like them lots!
cord lock, eye bolts, button holes
I purchased my cord lock, and rings on etsy.  Yesterday I was convinced that the cord lock didn't work - thankfully Joe had a look at it, and I had goofed it up.  Today they are gliding up and down, locking as I want them too - yay!
rings for cording
I used a zig-zag stitch, with the smallest stitch length, I ended up dropping the feed dogs too, in order to sew the rings on without too many holes in the fabrics.  There is also a dowel in the hem to keep things flat as it lifts.  


My rings are spaced 9" apart and start 6" from the bottom, then every 12" up from there.  All in all they went together really easily, getting them hung with Joe's help alleviated a lot of my frustrations.  I know some of you may have more questions, and I will do my best to answer them in the comments.


I hope you have a great weekend~
Amy
--------------------------------------------------- 
Next steps: 
Subscribe to Amy's Creative Side 
Shop with Amy 
Follow Me on Twitter 
Become a fan of Amy's Creative Side on Facebook 
Email me

April 29, 2010

Coming Together

Hi there!  I've got Blogger's Quilt Festival on the brain - taking my time to work out all the details with sponsors. It's going to be great!!  If you are a shop and interested in being a sponsor, send a quick email to me with a link and I will get the details to you right away!  It's a great opportunity to get your name out there :)

Do you have a quilt ready to share!?  May 21 is the first day of our festival!

My Roman Shades are nearly done, maybe I will even be back later today with a pic....my living room is a bit of a mess at the moment.  Have to put my kiddos to work :)

What are you up to today?

Amy

PS - Did you notice Fat Quarter Shop is celebrating their anniversary with a huge sale!?  There's a few things, in my shopping cart :)
---------------------------------------------------
Next steps:
Subscribe to Amy's Creative Side
Shop with Amy
Follow Me on Twitter
Become a fan of Amy's Creative Side on Facebook
Email me

April 27, 2010

Roman Shades & a Winner!

This roman shade project has been on my list since we painted the living room in January!  I purchased fabric in February, and finally collected all the bits and pieces needed to make it.  I had to let my ideas fully form, before I was ready to cut (some may call this procrastination!), but I decided I'm ready.   Last night I got all my pieces cut, and today I hope to get the sewing done.

When we get them mounted, I will show you our living room :)
-----
The Blush Layer Cake goes to -- #284

Congratulations Julie!!  I would love to see what you make with this.

Thank you to everyone that left sweet comments  -  I loved reading through them all!  You guys make my day with everyone :)

Blessings ~
Amy
---------------------------------------------------
Next steps:
Subscribe to Amy's Creative Side
Shop with Amy
Follow Me on Twitter
Become a fan of Amy's Creative Side on Facebook
Email me

April 08, 2010

Pins Recapped

I have to say thanks to all of you that shared about your pins!  I'm always thankful to be a part of this community - and to call you all friends :)  I went through the comments and made tally marks for the different pins mentioned, Clover's Flower Head Pins  were the most mentioned by far, as were all of Clover's pins.

It's clear that a fine, sharp, and long pin are what we, as quilters are drawn to.  And I'm with a few of you wanting to try the fork pins- I always pin on both sides of the seam intersection, and these make so much sense!

To be honest in the past I've been drawn to the 500 pack of pins because I'm such a stickler about pinning, and pinning everything all at once.  But I plan to start small, this time, and work on a large collection of really nice pins.

A few of you mentioned emory pin cushions, friends on twitter have also suggested crushed walnut shells.  Julie tells me you can find it easily at pet supply stores - it's lizard litter!  LOL but it works!

One last question for all of you - How often do you replace your pins?  I'm sure it depends on use, but I wanted to throw it out there :)

Thanks again~
Amy

PS - I made a button, if you want to add it to your sidebar, just copy the code!
---------------------------------------------------
Next steps:
Subscribe to Amy's Creative Side
Shop with Amy
Follow Me on Twitter
Become a fan of Amy's Creative Side on Facebook
Email me

April 06, 2010

Pins

I need new pins.  You all have seen mine in action, I use them a lot, and they are dull, bent up and not gliding very well.
So I'm looking to you to tell me your favorite pins.  Why do you love them?  Where did you find them?

I finished my blocks last night, should be a quilt top today and then I get to move on, oh, and write instructions. . . :)

Serious where'd you get your pins!?

Amy
---------------------------------------------------
Next steps:
Subscribe to Amy's Creative Side
Shop with Amy
Follow Me on Twitter
Become a fan of Amy's Creative Side on Facebook
Email me

March 29, 2010

Like New Ironing Board

I think it is better than new!  The fabric used on most ironing boards is so cheap - flimsy, rough, and blah.  I've had my current ironing board for about a year, and I was happy for the first week, then the first hole appeared in the side!  I put the recovering effort on the to do list, and there it sat, until now :)  My delay has been part, lack of fabric/time, part calculating a plan.

What do you think!?  I'm pleased as punch!

Anticipating questions, I took a few pictures.  My desire with this cover is to remove it and wash it as needed.  I like to use a lot of starch, and tend to overdo it, so the original cover is sticky and stained.  (You may have noticed it in this tutorial) So I decided to make it reversible.  I also wanted it to be cushy so that I can easily sink my seams into the board as I press, so I used two layers of warm and natural.  I have to say it's working great so far!

Here's what you need:
- Length of fabric - 6" longer than your ironing board
- 1 or 2 pieces of batting, also 6" longer than board
- binding material to go all the way around
- 1/2" elastic, I used about 3 1/2 yards


Cut down the bold crease of your length of fabric.  Lay one face down on the floor, then add batting and second layer of fabric.


Add your ironing board, measure 3" all the way around.  Use a bowl to create curves, if needed.  Trim to size.
Prepare you casing fabric, fold and iron wrong sides together, like a binding.  Open, then iron 1/4" crease in one side.
To add casing to the cover, open the casing, sew raw edges matching all the way around.  Then turn over and sew the folded side along seam sewn previously.


Insert elastic, errr, wrestle the elastic through the casing, and pull tight!  Secure the elastic with a zig-zag stitch and enjoy!

The fabric used here is Blush - you can find some at Piece n Quilt or Fat Quarter Shop.

Did I leave something out?  Have questions?  I'll answer them in the comments for everyone.

I hope you are having a great Monday!
Amy
---------------------------------------------------
Next steps:
Subscribe to Amy's Creative Side
Shop with Amy
Follow Me on Twitter
Become a fan of Amy's Creative Side on Facebook
Email me

March 25, 2010

Ella's Dress!

I woke up yesterday morning feeling much better!  A good night's sleep was just what I needed :)

During Owen's nap I took a couple hours to finish Ella's dress, and then in the evening I worked the blind hem  out with my machine and hemmed the other two dresses.  whew!  It feels good to be done with these!
Ella's dress is Simplicity 2993, no sleeves to put in, but the collar is a bugger to get in.  End result is really cute though!  The fabric is Alhambra II, again I let Ella select the fabrics she wanted her dress made with, and she loves it!

Now I just need to get the three of them in the dresses and take their pictures - sounds easy enough, right!?

Blessings~
Amy

PS - Do you have questions about garment sewing?  I'll answer in the comments, if you do!

I'm linking up here:

Check it out!
---------------------------------------------------
Next steps:
Subscribe to Amy's Creative Side
Shop with Amy
Follow Me on Twitter
Become a fan of Amy's Creative Side on Facebook
Email me

March 24, 2010

Excuse Me, Please!

I was hoping to have a finished dress to show you again today. . . I caught Ella's cold, and have been taking it easy.  I'm hoping to be feeling much better today!  And then finish it :)

I'm itching to have a quilt or two to post here!  I love looking through flickr and seeing beautiful creations - there's just not enough hours in the day!  You all understand that one!!

I have posted a poll in my sidebar - I did the same one a long ways back, before the inception of Blogger's Quilt Festival, before most of you were readers.  How do you press your seams?

Amy
---------------------------------------------------
Next steps:
Subscribe to Amy's Creative Side
Shop with Amy
Follow Me on Twitter
Become a fan of Amy's Creative Side on Facebook
Email me

March 22, 2010

A Winner & Two Dresses

One small hiccup in my move.  While writing this, all my past comments are g o n e!  Totally missing - I think I read that they may slowly make the move, but I was expecting all those comments (with numbers!) to be there when I was ready to select a winner for the Burgundy Buttons giveaway!  Thank goodness, I have all my comments emailed to me!  If anyone has an answer to the missing comments - I'd love to know!

I lined up the emails and started counting :)  There were 440 entries and RNG selected #59

Which corresponds with Barbara!  Congratulations, Barbara :)
-----
I spent a couple hours working on dresses Saturday and Sunday afternoons.  My Sophia and Emmalie's eyes would grow wide as they realized I was working on their dresses - they are too cute!

This is Sophia's:

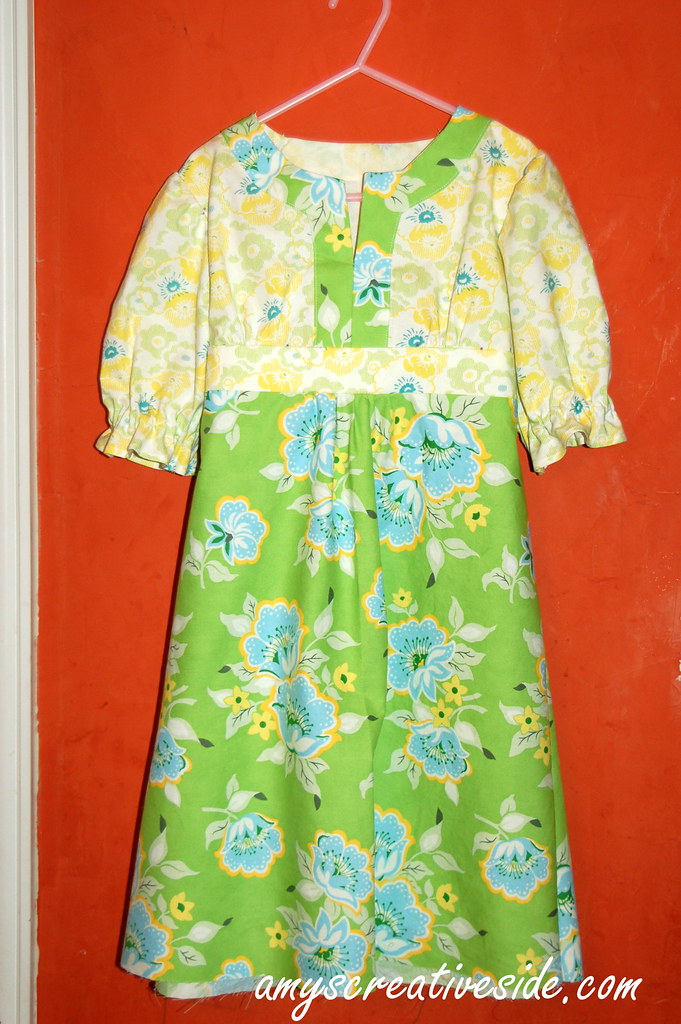
This is Simplicity 2711, and adorable, if I do say so myself!  I need to hem it and add a closure to the back yet, but I want to get Ella's to the same spot first :)  This pattern was fun and relatively simple, just lots of little steps in the bodice!

This is Emmalie's:

Green is her favorite color.  If she has a clean shirt and pants in green, she will wear them together - no matter what shade of green!  This flower had her name on it - and she loves, loves, loves that mommy finally made her a dress!

This is Simplicity 3546, little more challenging, mostly because it has a lot of options and a lot of instructions to go with them all!  But so cute and, Em had fun deciding which sleeves and collar she wanted to be made.  I'm not really all that indulgent with them, but a new dress is something to contemplate and make sure that they love.  Emmalie is especially picky in clothing too, so I want to be sure that she will actually wear it after spending the time making it!

The third dress, for Ellis, is cut and waiting - I need to get it done and move on, so hopefully today I will have the chance to sit and create a little :)

What are you up to today?

Blessings~
Amy
---------------------------------------------------
Next steps:
Subscribe to Amy's Creative Side
Shop with Amy
Follow Me on Twitter
Become a fan of Amy's Creative Side on Facebook
Email me


March 18, 2010

Sewing Garments!

I have two quilts due in a six weeks, but I've been promising dresses to my girls!  So my goal for this week has been to cut and start (maybe finish) three dresses!

I am a sucker for patterns when Joann's has them for $1 - we just happened to be there on one of those weekends a few months back, and I had the girls pick out patterns that they liked.  I am able to steer them toward quick and semi- easy patterns still :)  which helps!

Yesterday I finished cutting out the third dress and applied the interfacing needed, then set to work with the smallest!  I have three different patterns, so I'm taking them one at a time.  Here's the bodice to Sophia's dress --

I will share pattern details next time - I need to get it finished!  The fabrics are Nicey Jane - and so cute!  I'm hoping to add the sleeves and skirt later tonight, I'm excited to finish :)

Today I'm going to share my quilts with Emily's quilt guild!  All of them are quilts that you have seen here, nothing from my book - don't worry :)  I'm looking forward to meeting Emily - we've been blog buddies for a year and a half now, and finally meeting! 

I hope that you are having a good day, what are you up to?
Amy
---------------------------------------------------
Next steps:
Subscribe to parkcitygirl
Shop with Amy
Follow Me on Twitter
Become a fan of Amy's Creative Side on Facebook
Email me

February 02, 2010

Do you do this?

I have to wear slippers or some sort of shoe around the house.  Usually not the same one I've been wearing outside, especially this time of year.   They help my back from hurting, as I am on my feet non-stop, and keep my toes from freezing off!
 
 I take off my right shoe when sewing, and when someone needs something, or the world is ending in the other room - I jump up and take care of things!
 
 Am I the only one running around with one shoe on??


Today, along with all the usual sewing and household stuff, I'm sanitizing the house!  We've had three super sick kiddos (croupy cough cold)  the last few days, and I'm trying hard not to get it.  Hope you are having a great day!
Amy
---------------------------------------------------
Next steps:
Subscribe to parkcitygirl
Shop with Amy
Email me
add to kirtsy

January 14, 2010

Making the Most of my Space

So I've been thinking about my post for today, what should it be (insert - blank stare) and I remember the ebook - of course!  Inspired post!  One aspect of the post inspiration was finding balance, but I'm all out of balance right now - thankfully I DO sew at the kitchen table, that way I'm still in the middle of the family activities.

I want to share with you my studio, or lack thereof, and how I make it work for me.  Finding space is a constant struggle, I often purge stuff to make the bit of space I have work for me.  Someday I will be spoiled with a studio space of my own (I pray!) and then I will jump for joy - but right now, this is what I've got!


I've changed where I keep things a bit from when I last posted about my "studio" but the main principles are the same.  We added this dresser to the kitchen for more much needed storage  - I claimed two drawers for fabric as I loaded in baking sheets and miscellaneous utensils.  The ipod dock is the newest sewing accessory that Joe surprised me with recently!  It is a great little unit, with big sound :)


My ironing board hangs out over here when not in use.  I typically save up my ironing for one session, and try not to walk away - I hate to think of the kids pulling it over on themselves!  It goes up and down 2-3 times daily :)  And the iron is on top of the same shelf, wrapped up nice so there are no cords tempting little hands.


I've also added this printer cart that was sitting unused in another part of our home.  You can see my machine sits on the bottom shelf, my box of notions and fabric on the second, and a pile of quilt backs and bindings on the top with a couple of yet to be started quilts on the right.  My sewing machine also comes up and down a couple of times each day, I do my best to not have my machine or fabric on the table while the kids are eating.  We are not past spills, not in the least!


Part of the ease in it all is having my power cord plugged in, but out of reach when not in use.  Here it is with my aprons and pizza thingy.


I use the kitchen cart/island for cutting and organizing all the bits.  My cutting mat fits on top perfectly and I can walk all the way around it if I'm trimming blocks.  Or I can wheel it into the living room if I want to try to watch tv while working on top!


Finally, my bookcase, well in part!  I have books stashed everywhere :)  This one houses folders that I need regularly, sketch books, my rulers slide in on top of the books or stand, and my cutting mat goes behind it, when put away - not often lately.

This "studio" is less than ideal, but works for me!  Everything has a place of it's own when it needs to be stashed, but when I have 10 minutes or more, I can easily get to what I need and continue working on my project.  All the while keeping track of what the kids are up too!  Any suggestions you can think of?  I would love to know what you would do in my space.

I'm impressed with how many of you have voted!  I have not purchased any fabric myself, and I can't believe I didn't make that an option - that's what I get for blogging after 10pm.  Today is the last day and then I will post the results :) 

Thanks for reading!
Amy
---------------------------------------------------
Next steps:
Subscribe to parkcitygirl
Shop with Amy
Email me
November 18, 2009

How many times . . .

are you willing to take a seam out and re-sew it? As I sat at my machine taking a seam out for the third time today, I got to thinking - am I the only one that does this? I'm guessing probably not, but I have referred to myself as "anal Amy" on more than one occasion :)

Fourth time was the charm today, thank goodness that was the only junction that gave me repeated troubles!

I am curious though - how many times?


Amy


Next steps:
Subscribe to parkcitygirl
Shop with Amy
Email me

Bookmark and Share


November 14, 2009

Machine Tension

Kandra had a question about her tension on her sewing machine --

I do have a question about sewing... About a year ago, when I was a TOTAL newbie (now i'm just 2/3 newbie)to sewing and quilting, we bought a Janome sewing machine. However, the stitches are made on the BOTTOM of the fabric... so if I were to zigzag, the stitches are underneath the fabric and stitched with the bobbin thread. All stitches are like that, so I have NO CLUE how I'm supposed to applique or use those stitches. Any ideas?

Also, bobbin tension and thread tension.. I still have problems with this. I'd love suggestions on that too! LOL

Kandra, for your basic straight and zigzag the stitches should look pretty much the same on the top and the bottom. You need to get some scraps of fabric and start experimenting! My suggestion is to start at one end of the tension spectrum, sew 6-8 inches and examine the stitches. If they are not the same change it a whole number and repeat. Keep in mind, tension is more accurate when you sew samples with 2 layers of fabric.

I took a few pictures of a sample of both stitches for you. Click to enlarge if you need to. You should notice that the front and back look mostly the same, and the tension on my zigzag looks a little tight. . .

I hope that this helps! Does anyone else have something to add?


Good luck Kandra!

Amy


Next steps:
Subscribe to parkcitygirl
Shop with Amy
Email me

Bookmark and Share


November 01, 2008

Bookmarks Again


The box of scraps that Kristina sent me - has been taunting me! I am not quite ready to start into another quilt top, and a quick finish sounded nice. So I auditioned scraps for bookmarks! 3 of the 4 will end up in my etsy shop once I take individual pictures of each. (I'm not so fond of the black and white) Once again I find myself smiling when I see them :)

Hope you are having a great Saturday! We have a foot of snow on the way tomorrow - should be fun. But we have to wait and see if the weather people know their stuff!

Amy

July 10, 2008

Binky Patrol

Well, here's the extent of my creative endeavors for today! A bink connector for my little man. As we started walking a lot in the spring, Owen began tossing his bink right out of the stroller. We even found one the next day one time! I have not had much luck or fondness of the typical contraption found at Target or Wal-Mart, and being crafty would not pay for someone else's when I was clearly able! I found the clips on ebay for cheap and got started. I used scraps from Owen's quilt and whalaa!
Until about 2 weeks later - the clip lost it's grab, just gave up! It could have something to do with Owen yanking on it when he was not wanting it on him. . . So this is the last of the five clips I bought on ebay - then I am back to square one. You should notice that the bink is sewn in - no velcro, or snaps, my kids have always pulled them loose, I got smart and sewed it in place :) I just wash the entire thing in the sink as needed.
So if you know of any other options for the clip part that would be great! I had considered selling them in my shop, until I realized that it wasn't that great a product. . .